Installing MAAS
It is recommended to use as MAAS controller a server with:
CPU: 2+ core (physical or vcpu)
RAM: 4+ GB
NET: 1+ networks
OS: Ubuntu 14.04 or later
To install MAAS on the MAAS controller, perform these steps (see [MAAS_INSTALL] for further details):
Add the MAAS package repository to your list of software resource:
$ sudo apt-add-repository -y ppa:maas/stable
$ sudo apt update
You will be asked to confirm whether you would like to add this repository and its key.
Install MAAS on the server:
$ sudo apt-get install maas
This will install both the MAAS Region Controller and the MAAS Rack Controller, and will set sane defaults for the communication between the Rack Controller and the Region Controller.
Your MAAS server is now installed (both Region and Rack Controller).
Configure the server to be both a region and rack controller:
$ sudo dpkg-reconfigure maas-region-controller
$ sudo dpkg-reconfigure maas-rack-controller
providing the URL of the controllers replacing
localhostwith the IP of the MAAS server.
Access the MAAS web UI
If you want to use a web browser to connect to the Region Controller for the customization of your hosts, you’ll need to create an administrator account:
$ maas createadmin --username=$PROFILE --email=$EMAIL_ADDRESS
You will be prompted to supply a password for the choosen username. You can now open the MASS GUI at the URL:
http://<MAAS region controller address>:5240/MAAS

Figure 1. Login to the MAAS GUI
MAAS Dashboard
The MAAS Dashboard is the central hub for accessing parts of the web UI used to perform various tasks, e.g. managing Nodes, Images, and Subnets.
The Dashboard is available by clicking the top-left MAAS icon. Its URL is:
http://<region controller address>:5240/MAAS/#/dashboard
For example you can check the status of a cluster at Nodes > Controller, then selecting your region controller:
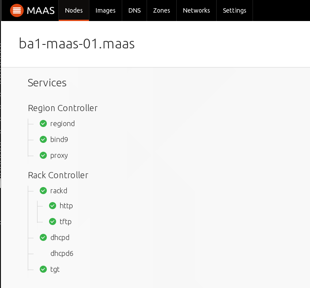
Figure 2. Status of MAAS controller.
Configuring MAAS from the web UI
Configure MAAS to use your favorite Ubuntu package repository.
MAAS comes set to use the official Ubuntu repository archive.ubuntu.com as well as the equivalent for architectures other than i386 and amd64: ports.ubuntu.com If you want to change the default repository, navigate to the Settings tab and scroll down to the Ubuntu section, set the field Main archive, for instance, to:
http://ba.mirror.garr.it/ubuntu/
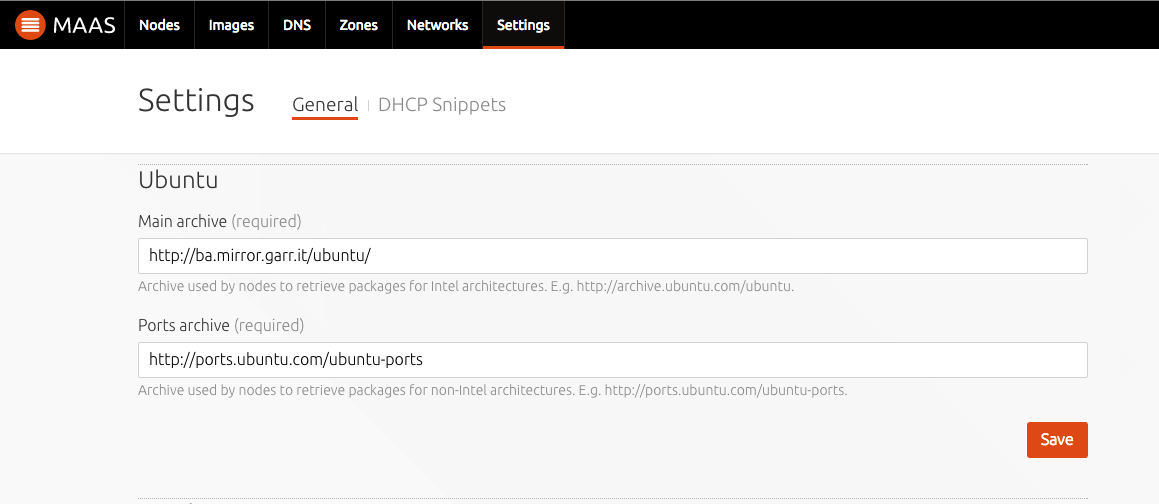
Figure 3. Selecting a repository mirror.
Navigate to the Settings tab and scroll down to the
Network configurationsection. Then:disable the checkbox of
Enable the use of an APT and HTTP/HTTPS proxy.add an upstream DNS used to resolve domains not managed by this MAAS.
add the address of NTP server for nodes (
ntp1.inrim.it)
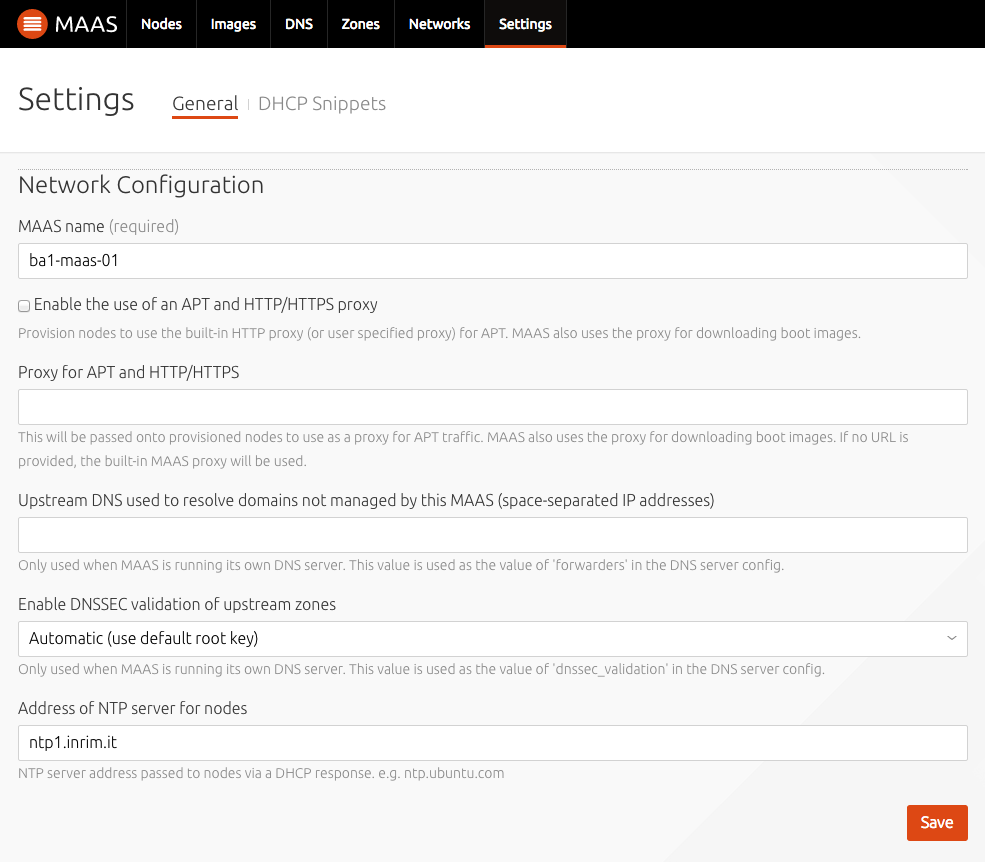
Figure 4. Network Configuration.
Before either an administrator or a user can deploy a machine, they need to import their public SSH keys into MAAS. This can be done by selecting the
Accountoption from theUsermenu on the top right: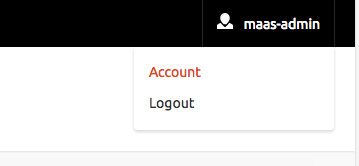
Figure 5. User Preferences.
Then, open the user preferences page and click on the
Add SSH keybutton. Finally, paste the contents of the local public SSH key file (usually $HOME/ssh/id_rsa.pub) into the box and selectAdd key.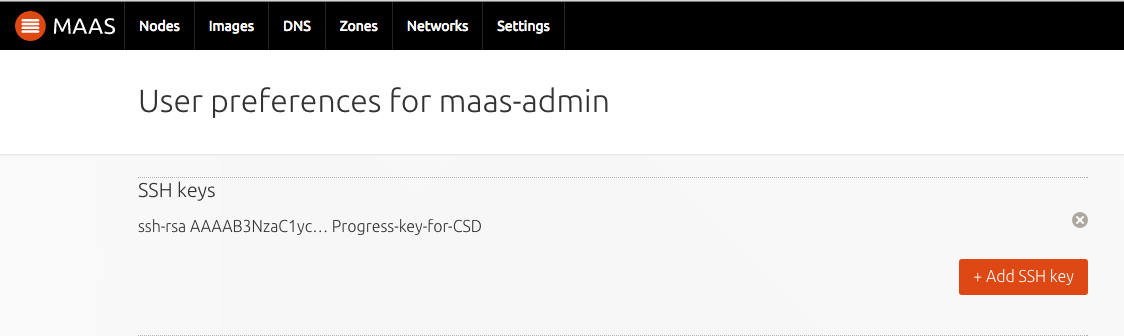
Figure 6. Add SSH Key.
This documentation assumes that a DHCP server managed by MAAS is used to enlist and commission nodes.
To fully understand this step you should first read:
[Concepts_and_terms] for an explanation of reserved IP ranges.
[MAAS_Networking] to explore in depth your network configuration.
[Commission_nodes] to understand IP assignment modes.
A reserved dynamic IP range is needed in order for MAAS-managed DHCP to at least enlist and commission nodes and the creation of such a range is part of the process of enabling DHCP with the web UI. To enable MASS-managed DHCP, under the Networks tab select the desired VLAN and then:
From the Take action menu select Provide DHCP. A new window will appear.
Select the primary rack controller. For DHCP HA, select both the primary and the secondary.
Create a reserved dynamic IP range. Fill in the fields Dynamic range start IP and Dynamic range end IP.
Configure a default gateway. Fill in the field Gateway IP.
Apply your changes with the Provide DHCP button.
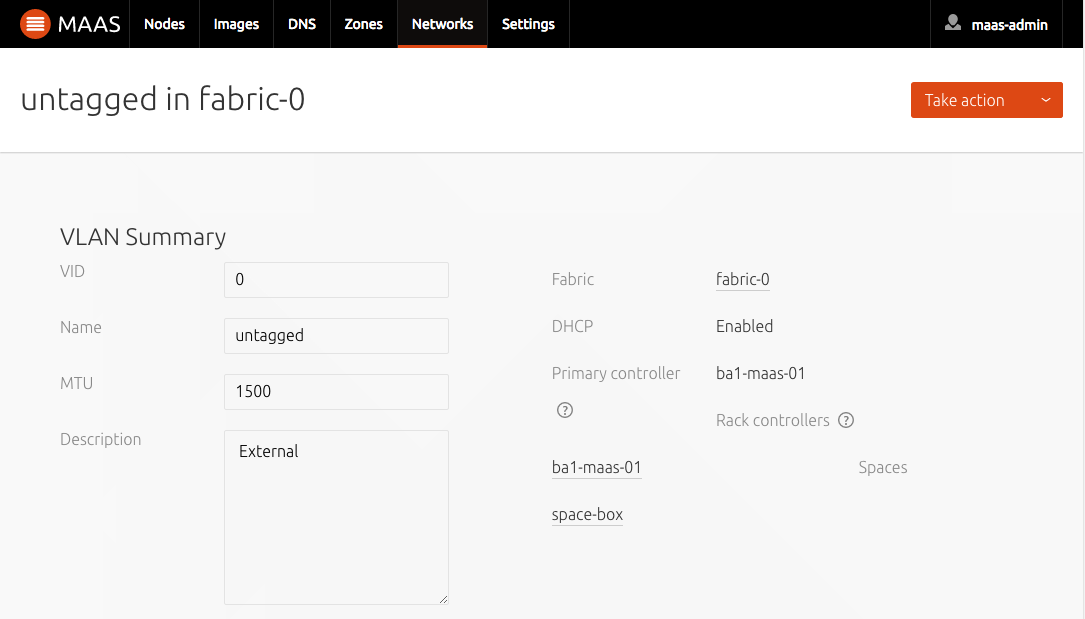
Figure 7. Enabling DHCP.
Addresses in the specified range will get assigned to machines that are being either enlisted or commissioned.
Complete the network configuration
Continue adding spaces, fabrics, VLANS subnets according to your architecure, keeping in mind these definitions:
- Spaces:
The logical group of subnets that Juju will use to bind deployed services to networks.
- Fabrics:
Sets of interconnected VLANS that are capable of mutual communication.
- Subnet:
a “layer 3” broadcast address range identified by a CIDR like 10.1.2.0/24 (IPv4), or 2001:db8::/32 (IPv6). A subnet can be part of one and only one space. In MAAS, a subnet can be attached to one VLAN and one space.
- Network:
we define a network as collection of subnets, all of which are in principle route-able to one another. It is an abstract, high-level concept, representing “network domains” with distinct boundaries, like the “office network”, “home network” or “the Internet”.
- VLAN:
VLANs are a common way to create logically separate networks using the same physical infrastructure. While there are different ways to implement VLANs, here we specifically refer to the IEEE 802.1Q standard.
The following screenshots show a typical MAAS network configuration.
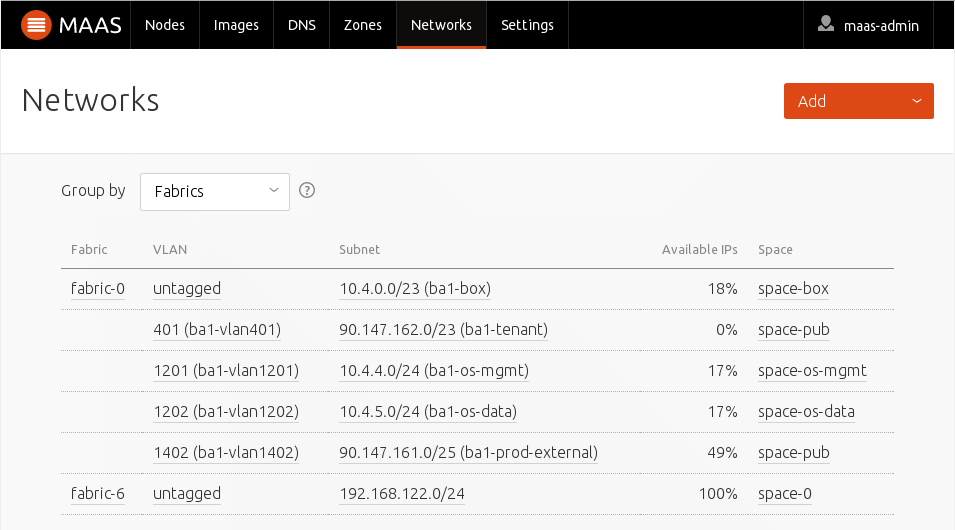
Figure 8. Fabrics.
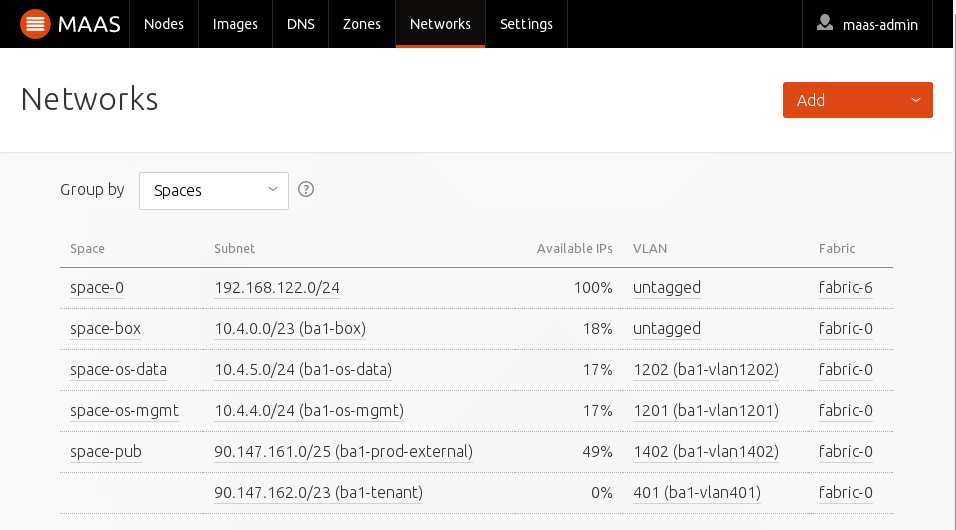
Figure 9. Spaces.
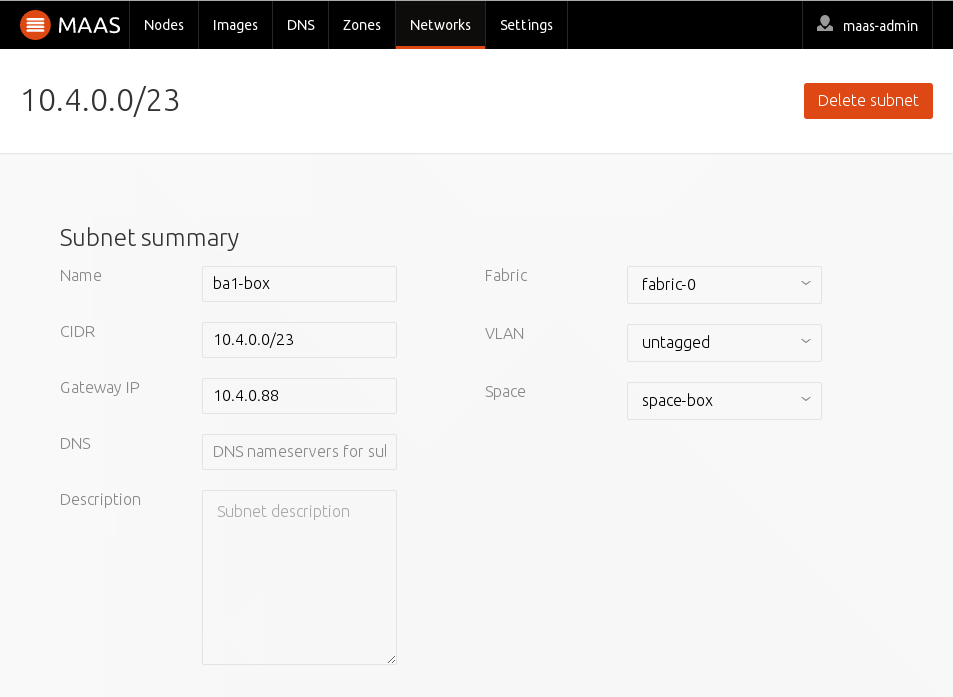
Figure 10. Subnet 1.
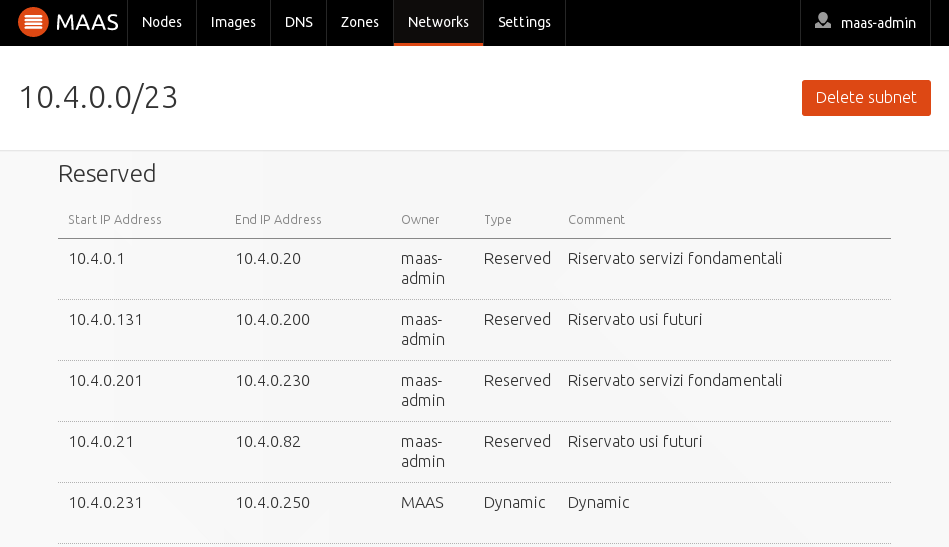
Figure 11. Subnet 2.
Add a node
Adding a node to MAAS is typically done via a combination of DHCP (and TFTP), which should, by now, be enabled in your MAAS environment, and PXE, which you tell the system in question to use when it boots. This unattended manner of adding a node is called enlistment. We suggest to add a node using the following command from your MAAS server (after login):
$ maas $PROFILE machines create architecture=$ARCH mac_addresses=$MAC hostname=$HOST power_type=ipmi power_parameters_power_driver=LAN_2_0 power_parameters_power_user=root power_parameters_power_pass=$PASSWS power_parameters_power_address=$IP_ADDR nodegroup=CLUSTER_CONTR zone=$ZONE
e.g.:
$ maas maas machines create architecture="amd64/generic" mac_addresses="74:E6:E2:5C:72:FB" hostname=ct1-r2-s3 power_type=ipmi power_parameters_power_driver=LAN_2_0 power_parameters_power_user=root power_parameters_power_pass=<hidden> power_parameters_power_address=10.200.3.101 nodegroup="Cluster Catania" zone=Catania
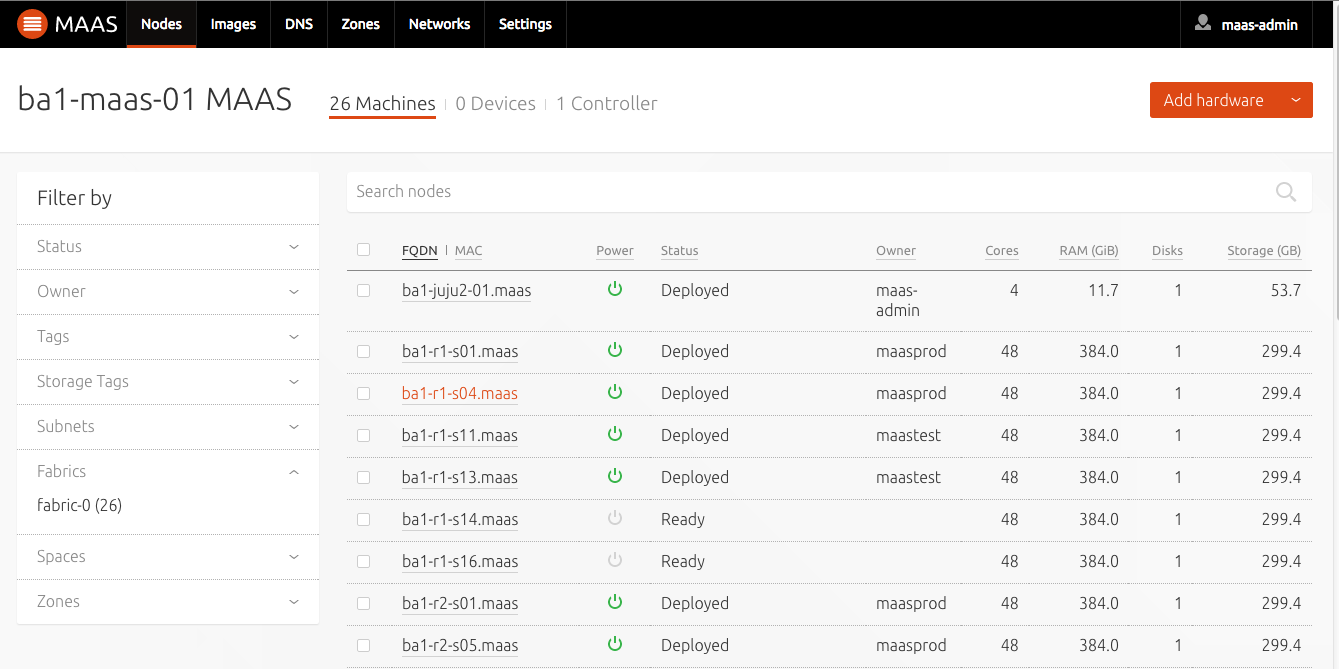
Figure 12. Visibile nodes
MAAS CLI
In order to use the CLI for MAAS, one must first log in to the API server (region controller).
You will need the API key that was generated when your MAAS account was created. To obtain it, run this command on the region controller (i.e. where the maas-region-controller package was installed):
$ sudo maas-region-admin apikey --username=$PROFILE
The command returns the API_KEY to be used to login:
$ maas login $PROFILE $API_SERVER $API_KEY
where PROFILE is the username of the administrator and API_SERVER is the URL of the region controller API.
For example, the PROFILE mighT be admin’ and the `API_SERVER might be http://localhost:5240/MAAS/api/2.0.
To obtain a list of available profiles and corresponding URLs, issue:
$ maas list
See [MAAS_CLI] for further details on working with the CLI.
Configuration scripts
Common operations to perform on commissioned nodes are configuring storage and network.
Since these steps might have to be applied to many nodes, we are providing two sample scripts for automating this process.
Download the scripts to the MAAS server and edit the parameters according to your needs.
Warning
The scripts below are taylored to a specific hardware configuration,
consisting of servers with 4 NICs which the script scripts/configure_network_template.sh
aggregates in a bond.