Container Platform
The GARR Cloud Container Platform is an environment for automating deployment, scaling, and management of containerized applications, based on
Kubernetes enables rapid application development and iteration by making it easy to deploy, update, and manage your applications and services. You can attach persistent storage and even run a database in your cluster. Simply describe the compute, memory, and storage resources your application containers require, and Kubernetes provisions and manages the underlying cloud resources automatically.
Support for hardware accelerators enables running Machine Learning, General Purpose GPU, High-Performance Computing, and other workloads that benefit from specialized hardware accelerators.
For an introduction to Kubernetes try the Kubernetes Basics tutorial.
The GARR Container Platform uses the same accounts as the GARR Cloud Compute Platform. To appy for an account, register here.
Getting Started
Install kubectl
You need to install kubectl on a machine, which might as well be a VM on the GARR Cloud.
Follow these instruction to install kubectl.
This cheatsheet lists the commands available.
Install the kubectl-keystone-auth client
The kubectl-keystone-auth client enables Kubernetes authentication through the OpenStack identity service.
Create a directory in your home:
$ mkdir -p ~/.kube/bin
Linux
On Linux issue the following commands:
$ cd ~/.kube/bin
$ curl -L https://github.com/kubernetes/cloud-provider-openstack/releases/download/v1.19.0/client-keystone-auth -o kubectl-keystone-auth
$ chmod +x kubectl-keystone-auth
Mac OS
On Mac OS issue the following commands:
$ cd ~/.kube/bin
$ curl -L https://github.com/kubernetes/cloud-provider-openstack/releases/download/v1.19.0/client-keystone-auth -o kubectl-keystone-auth
$ chmod +x kubectl-keystone-auth
Obtain the Kubernetes configuration file (kubeconfig)
Log into the Horizon dashboard:
Select Application Credentials from the Identity tab on left side bar:

Click the button + Create Application Credential:
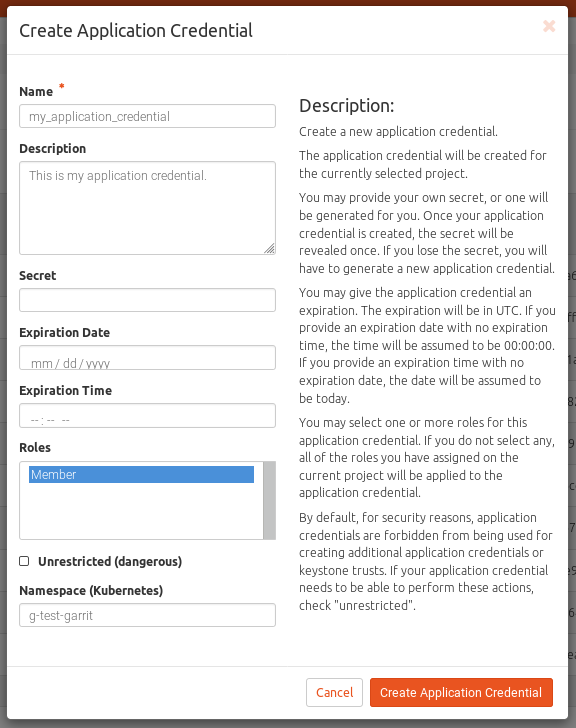
Click on the Download kubeconfig file button:
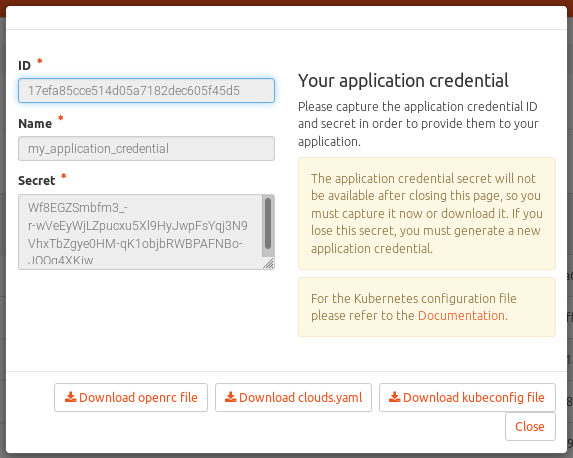
The downloaded file will have the name app-cred-NAME-kubeconfig, where NAME is the name
you have chosen for your credentials.
Move the file to ~/.kube/config
(you can find more details on kubeconfig files)
Warning
Please unset any OpenStack shell environment variable (OS_XXX), to avoid conflicts in the authentication process.
Test the credentials:
$ kubectl get pods
No resources found.
That’s correct: you have created no resources yet.
Namespaces
Your resources will be allocated in a virtual cluster, or namespace in Kubernetes terminology. The default namespace assigned to you is listed in the kubconfig file, as an attribute of the context:
contexts:
- name: kubernetes
  context:
 cluster: kubernetes
    user: YOUR_EMAIL
    namespace: YOUR_NAMESPACE
You may specify which namespace to use with the option -n NAMESPACE or –namespace=NAMESPACE to kubectl. There is no need to specify it if you use your default namespace.
Dashboard Access
You can access a Kubernetes dashboard for controlling your cluster through a GUI at theURL:
https://container-platform-k8s.cloud.garr.it
To log in to the dashboard you need to authenticate. Follow this procedure:
List your secrets:
$ kubectl get secrets
NAME                  TYPE                                  DATA      AGE
default-token-g98dg   kubernetes.io/service-account-token   3         1d
Obtain the token for the secret named default-token-xxxx (in this example default-token-g98dg):
$ kubectl describe secret default-token-g98dg
Name:         default-token-g98dg
Namespace:    USER_NAME
Labels:       <none>
Annotations:  kubernetes.io/service-account.name=default
              kubernetes.io/service-account.uid=fcd785ad-8ffd-11e8-8674-74e6e266c8e1

Type:  kubernetes.io/service-account-token

Data
====
ca.crt:     1167 bytes
namespace:  5 bytes
token:      AAAABBBBBCCCCCCDDDDD....
Open the dashboard and select the Token method (see figure).
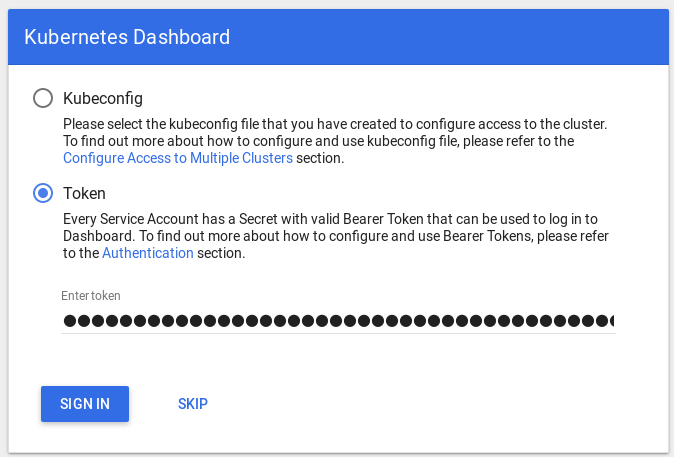
Enter the token and press SIGN IN.
You will land in the default namespace where you don’t have permissions, so you will get error messages like these:
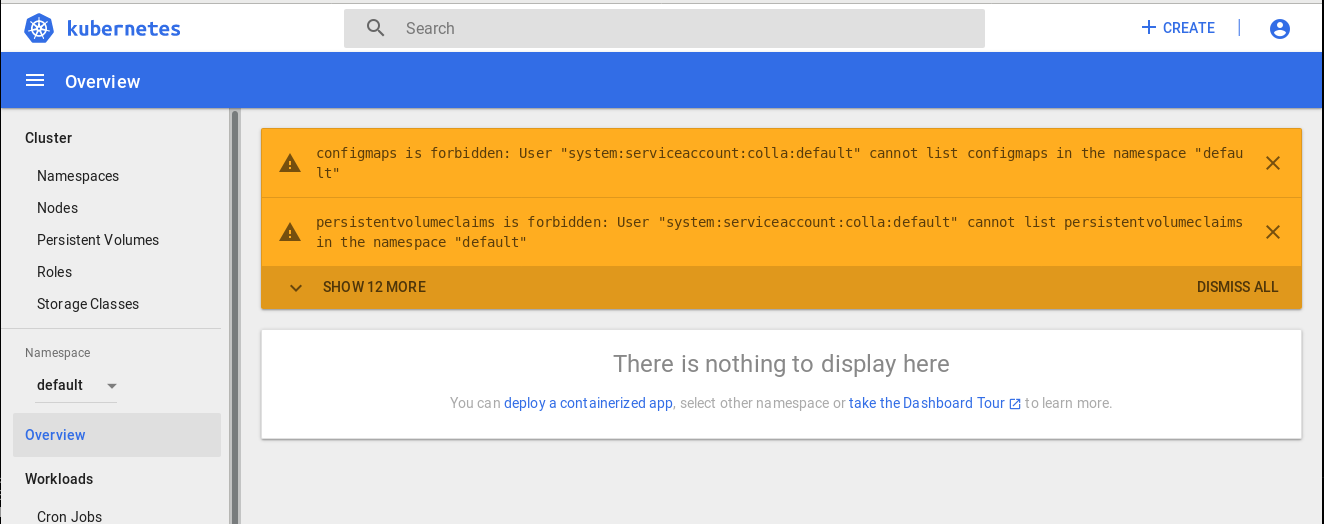
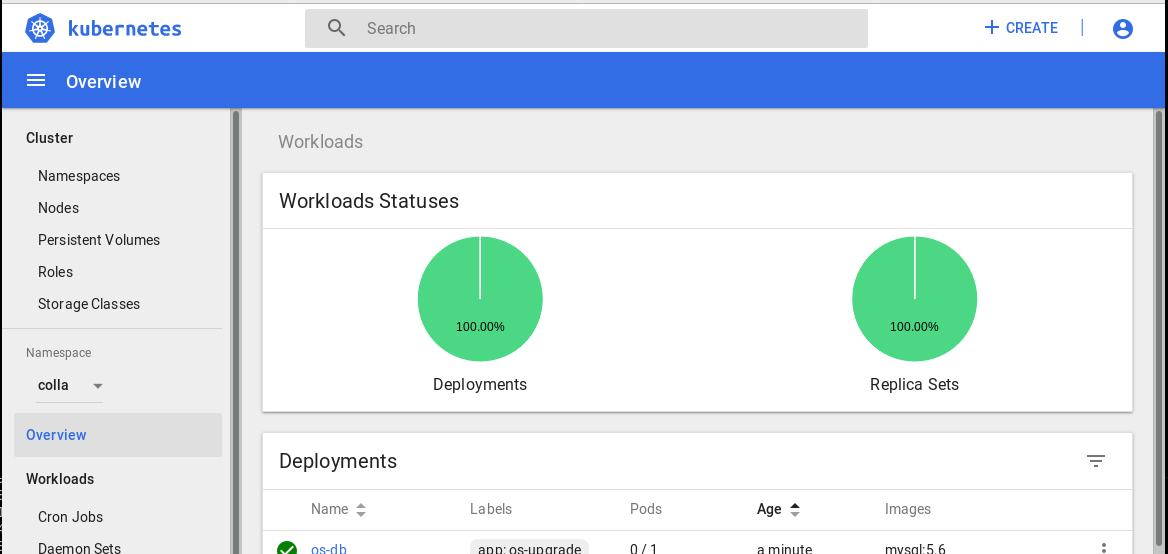
Click on default below Namespace on the left panel and enter the namespace that has been assigned to you on registration. You will now be able to see your deployments! (see figure).
Testing
See this example to test the cluster.
Persistent Volumes
See this guide for instructions on how to claim persistent volumes to use with a deployment.
Use Case Example
See this example for instructions on how to deploy a typical service, made of a Web application with a DB backend on a persistent volume.
Package Deployment with Helm
The container platform provides helm for deploying packages. See these instructions for how to use it.
GPUs
The Container Platform includes a node with a few Nvidia Tesla V100 GPUs. Read these instruction on how to use the GPU’s.