Create an Openstack Load Balancer
This guide shows how to create and use an Openstack Load Balancer. We will create two VMs, a Load Balancer that will balance the load between these two VMs, and will test the Load Balancer with curl.
Create the VMs
Create two VMs in your Openstack project through the Dashboard or CLI. Name it, for example, test-vm-1 and test-vm-2.
Create a new security group that enables network traffic on port 80 and associate it to the VMs.
Create and associate a floating IP to each VM.
Run a simple web server
On test-vm-1:
ssh ubuntu@<floating-ip-srv1>vim index.html-> <html>This is SERVER 1</html>sudo python3 -m http.server 80 &> /dev/null &
On test-vm-2:
ssh ubuntu@<floating-ip-srv1>vim index.html-> <html>This is SERVER 2</html>sudo python3 -m http.server 80 &> /dev/null &
Create a new Load Balancer (Openstack CLI)
openstack loadbalancer create --name test-lb --vip-subnet-id <subnet-id>openstack loadbalancer listener create --name test-listener --protocol HTTP --protocol-port 80 test-lbopenstack loadbalancer pool create --name test-pool --lb-algorithm ROUND_ROBIN --listener test-listener --protocol HTTPopenstack loadbalancer member create --subnet-id <subnet-id> --address <test-vm-1-private-ip> --protocol-port 80 test-poolopenstack loadbalancer member create --subnet-id <subnet-id> --address <test-vm-2-private-ip> --protocol-port 80 test-poolGet the loadbalancer vip port (vip_port_id) ->
openstack loadbalancer show test-lbCreate a new floating ip through the Openstack Dashboard or CLI
Associate the previous floating ip to the Load Balancer vip port->
openstack floating ip set --port <vip-port-id> <floating-ip>
Create a new Load Balancer (Openstack Dashboard)
Select “Load Balancers” from the menu and select “+ Create Load Balancer”.

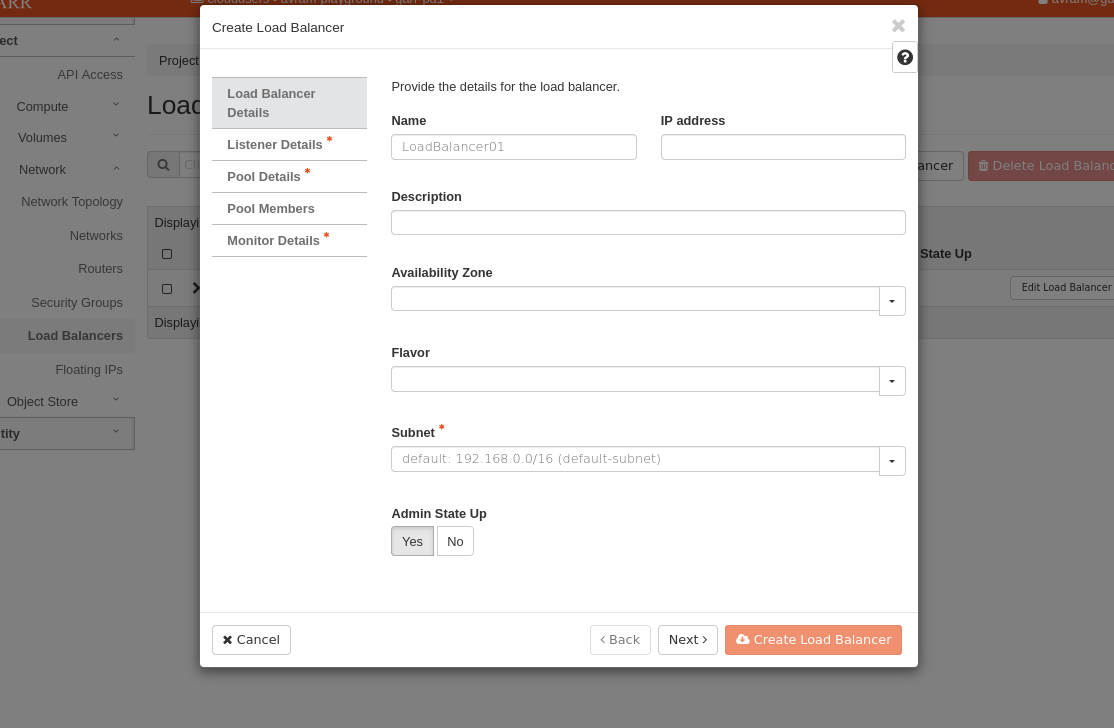
Name the new load balancer and select the subnet (must be the same subnet of test-vm-1 and test-vm-2).
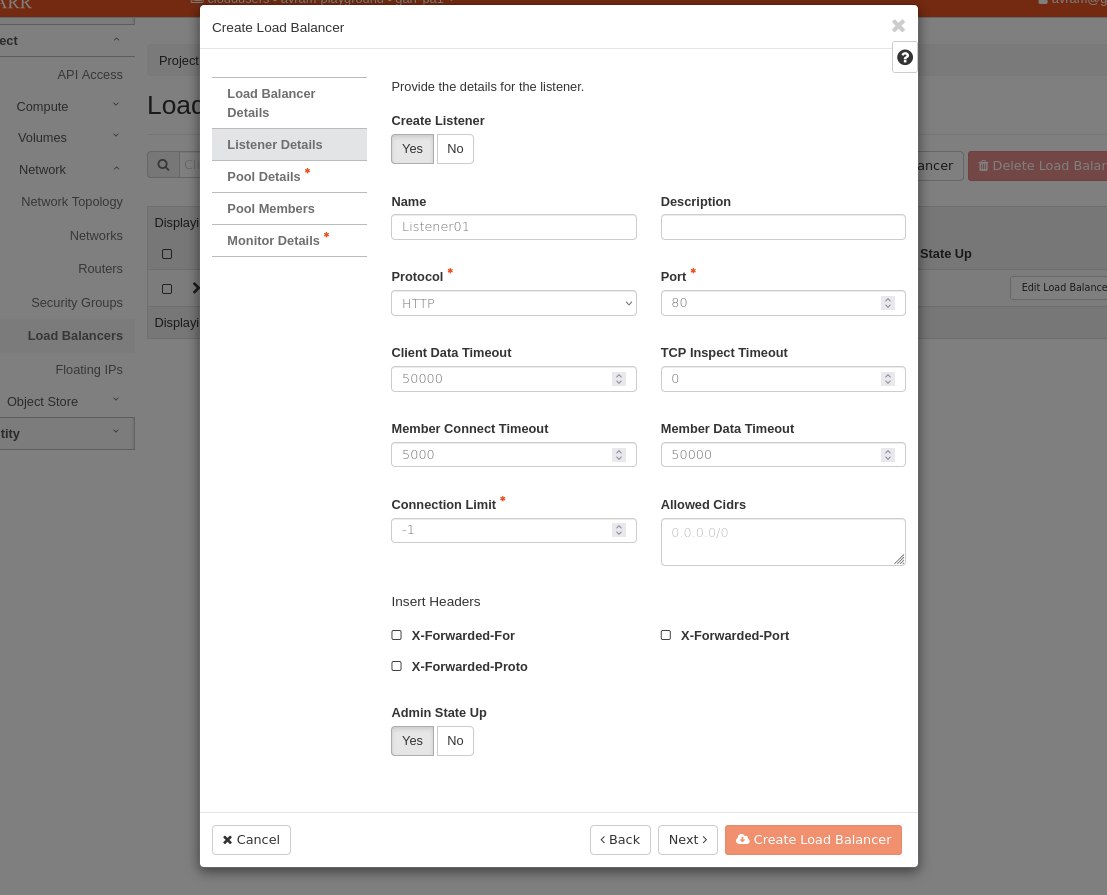
Create a listener and select the protocol/port (HTTP/80 in our case) the load balancer should listen to.
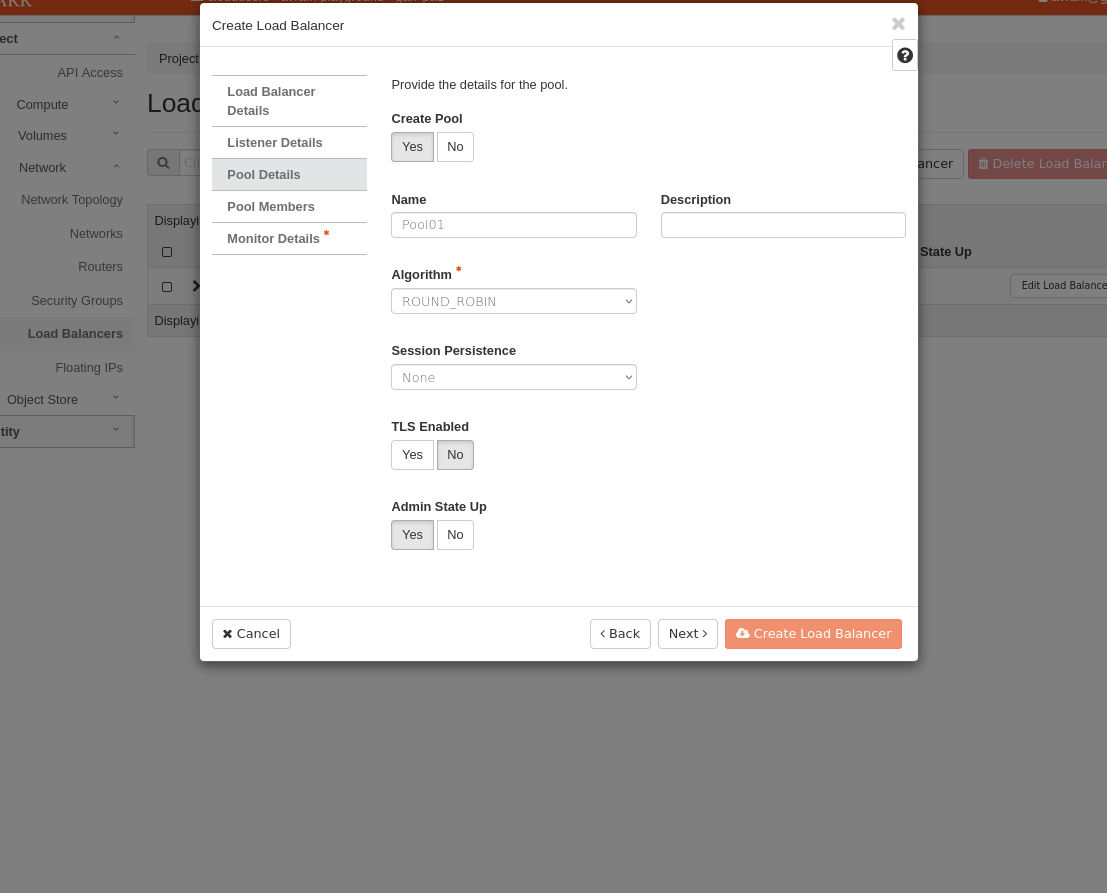
Create a worker pool and select a load balancer algorithm. The chosen algorithm determines how the workload is distributed among members when new connection requests arrive.
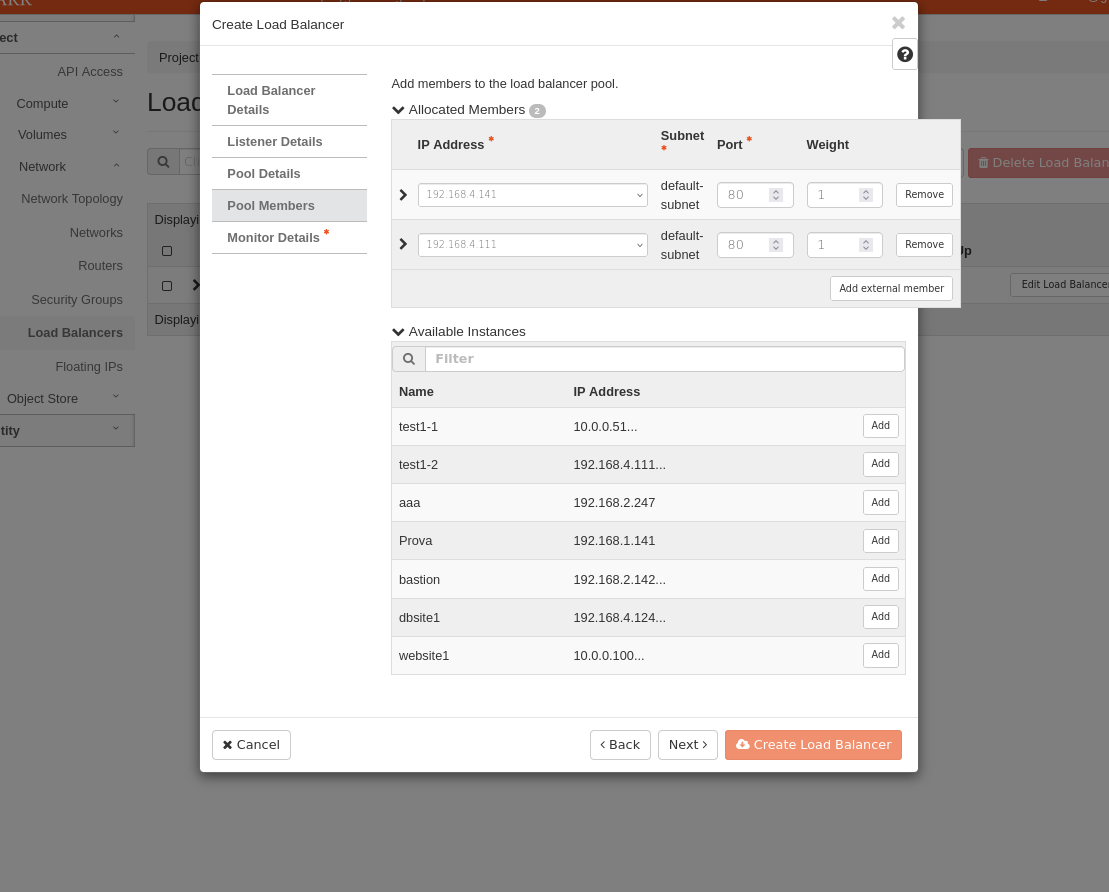
Add members (test-vm-1 and test-vm-2 in our case) to the new pool, and for each select the subnet IP and the port (80 in our case) of the service running on that host.
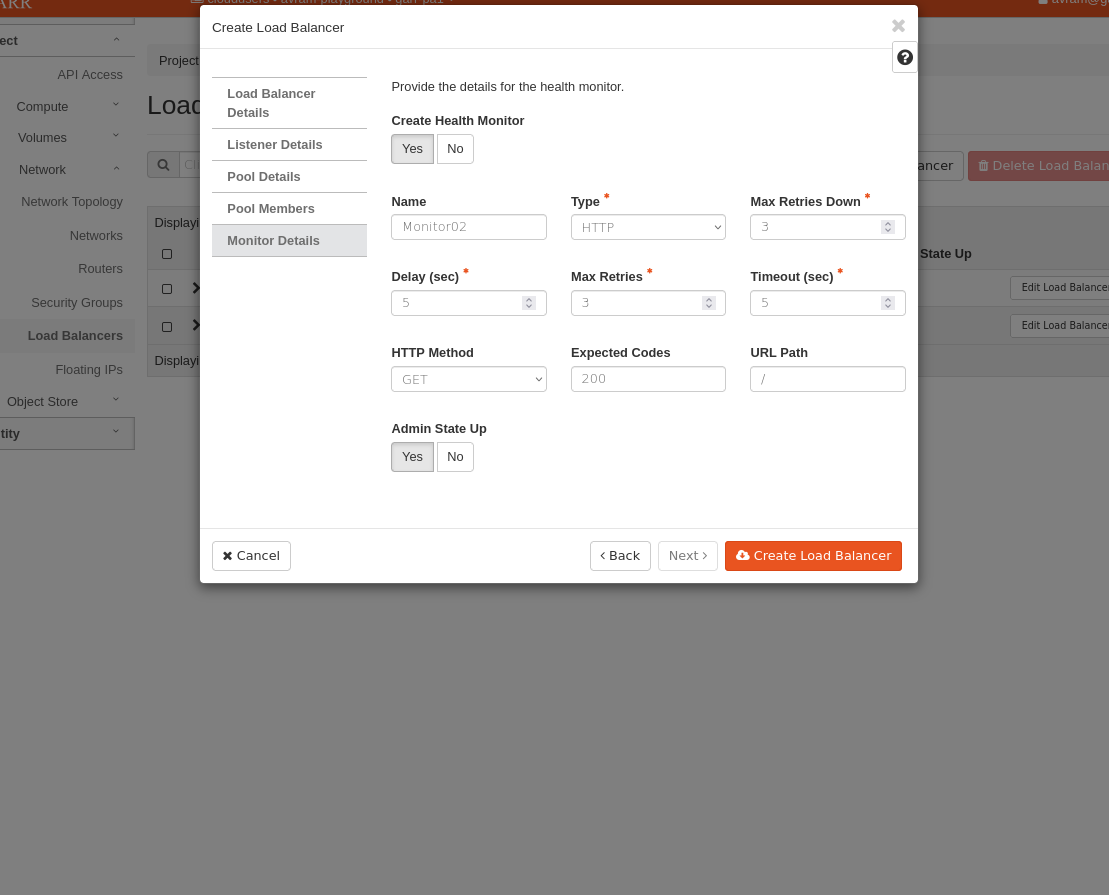
Create a monitor and select the type of service (HTTP in our case) to monitor on each member host. Click on Create Load Balancer to finish.
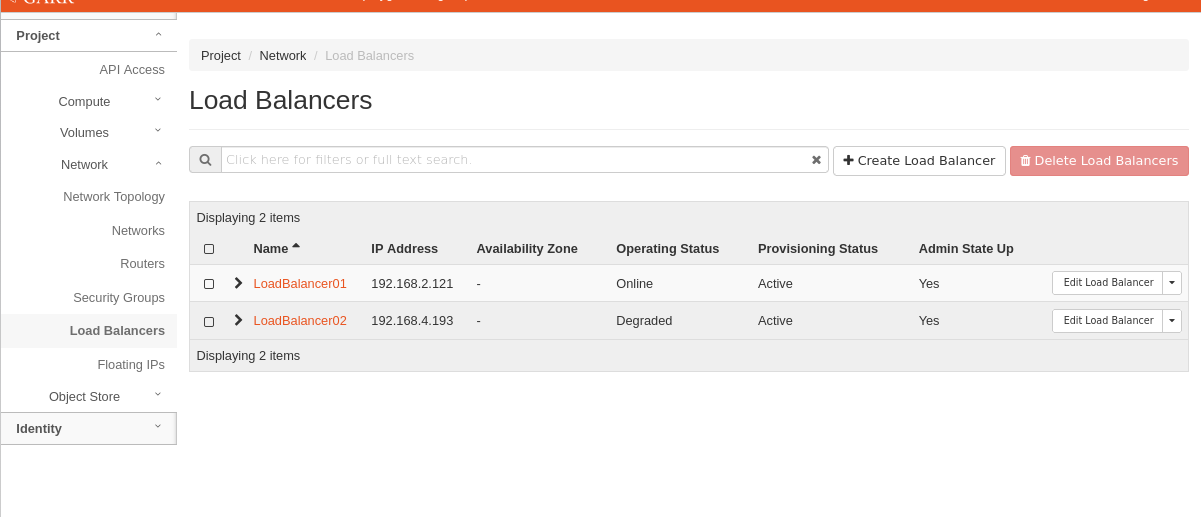
Wait until the load balancer Operating Status becomes Online. If a member is unreachable to the load balancer Operating Status turns to Degraded, in that case the requests are routed to the remaining members.
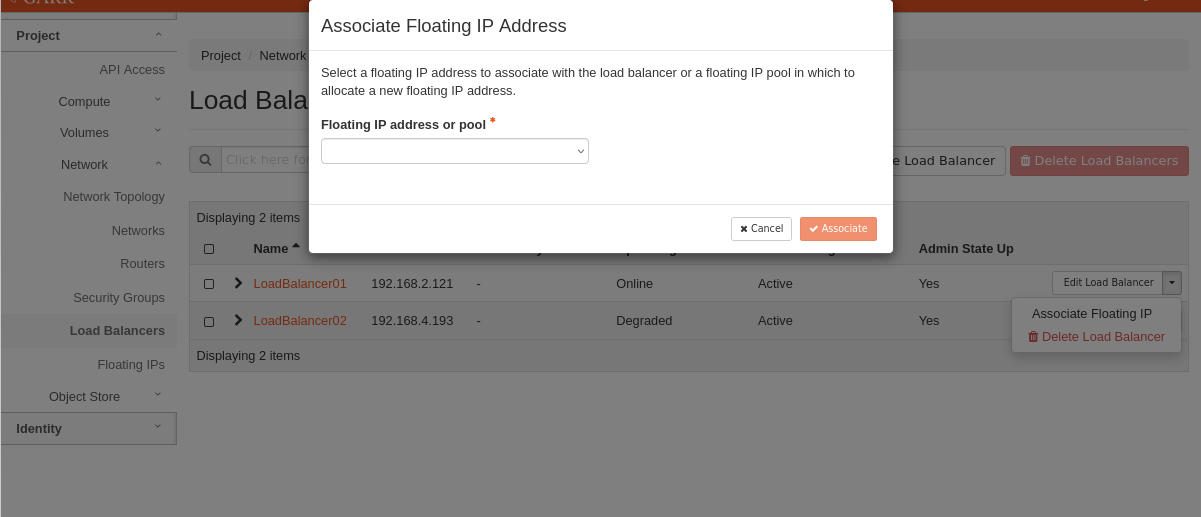
Assign a Floating IP to the new load balancer.
Note: now it is possible to remove the floating ips from the two VMs.
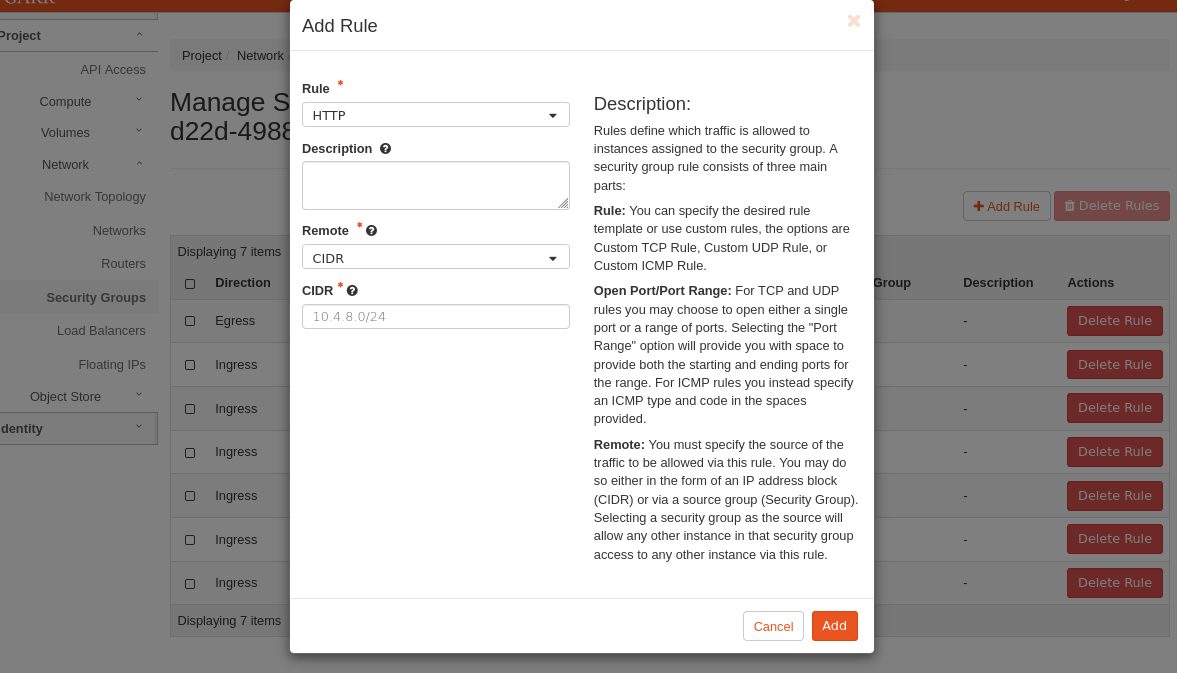
Note: If the service should not be visible from the Internet (0.0.0.0/0) create a security group that enables ingress traffic from default or your custom network and associate it to the VMs otherwise the load balancer will not be able to forward the requests to it’s members. The CIDR of the security group rule is the network IP (if you use the “default” network it’s 192.168.0.0/16).
Test the Load Balancer
curl <Load-Balancer-floating-ip>